![]()
![]() Compass
Compass ![]() Timer
Timer ![]() Exit
Exit ![]() Customize Text Box Labels
Customize Text Box Labels ![]() Common Screen Functions
Common Screen Functions
There are several functions of the CyberLAB system that you should know before you begin to use the application. Take a few minutes to view the descriptions and procedures.
The functions are:
CyberLAB compass
Timer for CyberLAB
Exit path
Common screen functions

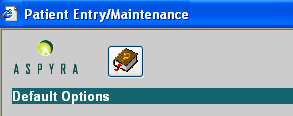
The screens in the CyberLAB system provide a continuous compass for you. If you are not certain where you are working in the application, look at the bars in the upper part of the screen.
The top bar on the screen identifies the submodule, such as Patient Entry/Maintenance above.
The second bar identifies the name of the screen in the submodule.
Each facility defines at the user level the time to automatically log off the CyberLAB system. When that time of inactivity expires, the application closes and returns to the Log In Screen. To reenter the application, you have to log in again.
This procedure ensures that an unattended workstation does not remain connected to the CyberLAB system. As a result, unauthorized users do not gain access to patient data.
The time of inactivity at a workstation can be adjusted. Ask your supervisor or the system administrator.
To leave a screen in the CyberLAB system, always click the Exit button at the upper-right corner of the screen.
![]()
Note: Do Not Use the (red or black) X button at the top-right corner of the screen. This action can affect operation of the application.
![]()
The minimize button (a short line) at left reduces the screen to a button on the taskbar at the bottom of the screen.
The rectangular box at center expands the screen to full size or reduces it to half the size.
Most text box labels in the CyberLAB system can be customized by a facility in the following ways:
Rename text box labels to terms commonly used by facility
Deactivate specific text box labels and text boxes so that they are not visible on your screen
Define text boxes as required, optional, or view only
Note: For a description of mouse and keyboard functions, including clicks and keys, see Mouse and Keyboard.
There are several common functions that you encounter on the CyberLAB system's screens.
These functions are:
Checkbox - A square box that is selected or cleared to turn on or off an option.

Follow these steps:
To insert a check as a Yes response, position the pointer over the box and click. Or, use the Tab key to move the cursor to the checkbox, and press the Enter key.
Note: A blank box is a No response.
To remove a check as a No response, click the box. Or, use the Tab key to move to the checkbox, and press the Enter key.
Drop-Down List - A type of list box with an arrow at the right. Click the arrow, and the list displays.
![]()

Four optional procedures for the Drop-Down List are:
Click the arrow to display the list and select an item on the list.
Click the arrow to display the list, use the arrow keys on the keyboard to scroll the list, and select an item on the list.
Use the Tab key to scroll down the list to an item and press the Enter key to select it.
Edit - To review and/or modify text box entries on a screen or the text in a comment box. The edit function is performed to review and release patient test results performed on an instrument that interfaces with the CyberLAB system.
Invalid Entry - If you do not provide information in a text box, or the information is incorrect, the system displays an invalid entry message.
If the error message displays in a dialog box, click the OK button to close the message and return to the screen.
![]()
Required Entry - You are required to select or enter information in certain text boxes on a screen. If you do not provide information for a required text box, the system displays a message at the bottom of the screen. You must complete the text box before you can exit the screen.
![]()
Select - A term with two definitions in the CyberLAB system:
Double-click in the center of a word or press down the pointer and drag it across a word or phrase to select (highlight) it.
Click an item to choose it on a drop-down list, a selection list, or a list in a group box.
Selection List - When you see a ![]() Selection List icon on the right side of a text box, it indicates that a selection list is available.
Selection List icon on the right side of a text box, it indicates that a selection list is available.
Double-click in the blank text box and the selection list displays. For more information, see Selection List Know How.
Sort Links - On the selection list in the CyberLAB system, you can use sort links to select the way you want to view the data. If the sort link is active, it is blue, as shown below at left.

For more information, see Selection List Know How.
Start and End - Refer to a range of information entered on a screen. Ranges can be entered for data, such as Sample IDs, Patient IDs, and dates.
Tab Screen - A labeled group of secondary screens that have a flap similar to a file folder.
![]()
The tab screen that displays, such as the Sample Info screen above, has a dark blue background . Its background becomes white when you select another tab screen.
To select a tab screen, click the tab with a pointer. Or, use the Tab key to navigate to the tab screen, and press the Enter key to select it.
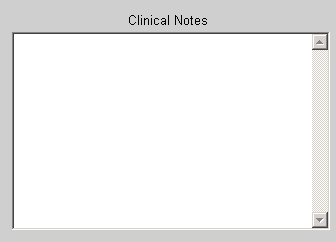
Text Box - A rectangular box of any size in which you can enter text.
![]()

Procedure: Click inside the text box and begin to enter text. Or, use the Tab key to navigate to the box and then start to enter text.
Time - The time text boxes within the CyberLAB system display the time of day in 24-hour cycles, also known as military time.
Enter time as follows: Hours followed by a colon and then the minutes. For example: 01:15 (1:15 A.M.) or 15:17 (3:17 P.M.).